Just like yesterday this is another meta-post where we’re going to write about how we’re building the 80daystartup.com site itself. Once the site is done we can really get started with Day 1 of the 80-day startup challenge and explore ideas of what to build as a product.
Yesterday we looked at the logo and design for this website. The next step is setting up the backend for the site, which we decided we would just use WordPress for to keep it simple. We need to get the design we’ve created yesterday into WordPress somehow, with a custom theme or something. I don’t really have a lot of experience with WordPress, so let’s just dive in and look at how all of that works first.
Server & WordPress install
There are plenty of hosted and ready-to-go options for WordPress. We simply took a Linux VPS provider and installed the latest WordPress on it, nothing too special.
Once we get to the more interesting part of setting up a server for our app later on, we’ll of course share all the details of the config and server setup. Whatever servers we might need for the product later on will be completely separate from the 80daystartup.com WordPress server anyway for security reasons. Even though we enable all the default security measures like a firewall for the WordPress server, we’ll consider it as completely untrusted. We always call servers like these radioactive: everything they touch is also considered untrusted, because you don’t want to be one WordPress exploit away from leaking customer data.
Site structure
With a standard WordPress install running, the next step was to make it look and work like we intended. I first made a list of things we want to show on the site:
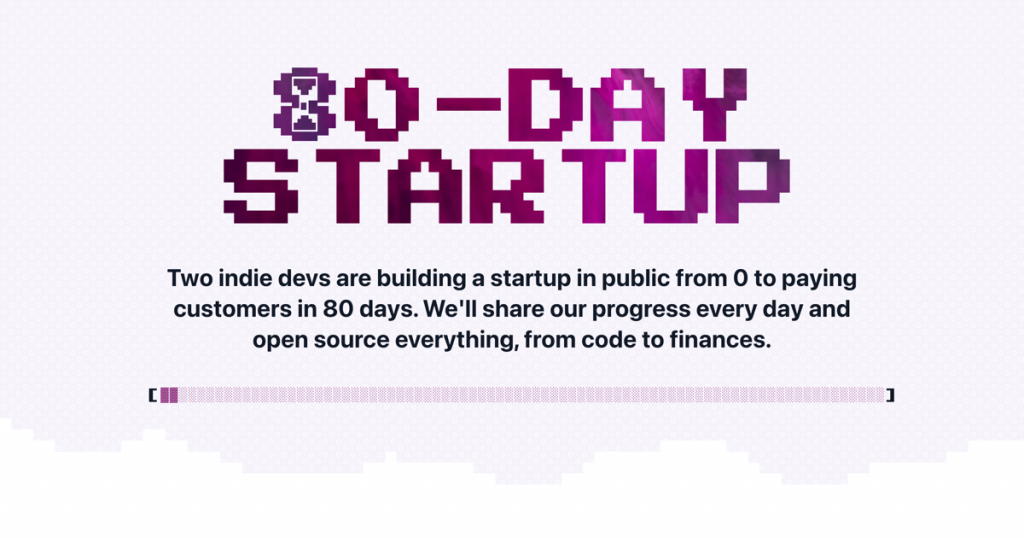
- The front page we designed yesterday as a welcome page. Here we explain what the 80-Day Startup is, the current status in the progress bar, a FAQ with more details and navigation.
- We also want all our “posts” to follow the same design template (footer, heading links, CSS, and so on).
- A “Day” entry. We want something like 80daystartup.com/day-42/ to show all posts for “Day 42”
- We also want something like /days/ to show a list of all days. The days will also be linked to from the percentage bar (each block is a day), but a separate page with all links spelled out seems helpful.
- Although most entries are probably browsed by day, we also want to have a list of topics which we’ve talked about so far. So something like /topics/ will show a list like “marketing”, “servers”, “press”, “javascript”, “VAT handling”, “launching” and so on. Clicking on a topic will then show a list of posts where we talked about that topic across all days.
- A “Subscribe” form where people can leave their email address if they want to receive updates, along with an RSS link if people want to follow the blog that way.
- A Search function
- Other default pages like a 404
It seemed Themes in WordPress are the more flexible way to customize everything the way you want to I started looking into those.
Creating a custom WordPress theme
I found https://www.dreamhost.com/wordpress/guide-to-developing-a-wp-theme/ as a resource on how themes work. Apparently there are WordPress Starter Themes we can use as a base, which include all the minimum base files and minimal CSS but without any styling yet, so we can replace the contents with the logic we want.
Base Theme
I followed the instructions to use https://underscores.me/, which is a very handy tool to generate a new, empty, base theme. Clicking “generate” gave a zip for the base project. Unpacked it into a new theme directory, theme80, which I added to the themes directory (wordpress/wp-content/themes/theme80). With the empty base theme “installed”, I activated it under Appearance > Themes. Everything now looked minimal without any style, so that worked.
Template hierarchy
I then read up about how all the files relate to rendering the different sections. The documentation in https://developer.wordpress.org/themes/basics/template-hierarchy/ was useful to understand all the concepts WordPress uses internally, such as “The Loop” to render a list of posts. Rather than each concept, like a “welcome page” mapping to a single .php template file, WordPress works with hierarchies of .php templates, which are queried in a certain priority to eventually get to a render function. I dove into the WordPress hierarchy template rabbit-hole with a bunch of pages like https://www.rarst.net/wordpress/front-page-logic/, http://www.chipbennett.net/2013/09/14/home-page-and-front-page-and-templates-oh-my/, https://wordpress.stackexchange.com/questions/110349/template-hierarchy-confused-with-index-php-front-page-php-home-php/110350.
Site section to .php file mapping
With a better understanding of what the inner rendering loop looks like, I mapped the structure we wanted to WordPress concepts/files in the theme:
- The welcome frontpage goes into
front-page.php, which should overwrite anything else that it might otherwise render as a main page. - Because WordPress already has a concept of categories, that seems a great fit to map to our “days”. So we can build the overview of all posts in a day by modifying
category.php. - Likewise, we can reuse the existing concept of tags for our topics. That way we don’t have to build a bunch of custom logic, and a page can already have multiple tags, which we also need.
- The concept of a “Page” (vs post) we can use for our other top-level pages such as “List of all days”, “List of all topics” and Search page. It seems we can just create a Page in the admin interface, and WordPress will look for a
page-<slug-of-Page>.phpto render any custom template for the page. We’ll simply create an empty placeholder page in the interface, and put everything there is to render in the .php file.
To make sure we can test all these concepts, I added a bunch of dummy examples for all those elements: a bunch of example blog posts in different “Day” categories, with different tags (topics).
I then created the top-level “Pages” in the interface: “Welcome” (/), “Topics” (/topics/), “All Days” (/days/) and “Search” (/search/). Using the Settings > Permalink options, we can also change the URL logic so that all entries for a day will be available under /day-X/ and topics under /topic/X/:
- Use “Custom Structure”
https://80daystartup.com/ %category%/%postname%/ - Under “Category Base”, entered ‘day’. That way when we navigate to a category, we don’t see /category/day-1, but /day/day-1.
- Under “Tag Base”, entered ‘topic’ (so we see /topic/server/, instead of /tags/server/)
Then, to set our static “Frontpage” as the homepage: Appearance > Customize (shows theme editor), clicked “Homepage Settings” in left bar, selected “A static page”, selected “Welcome” (the page created above).
Custom PHP
Time to fill out the .php files. Because we’re not creating the theme to make it reusable on some other website, I decided to keep as much of the design in the theme itself, rather than using WordPress features to render them. For example, the navigation menu is simply hardcoded in the header.php, instead of using the “Menu” setting. This way we don’t have to worry about any future Wordpress updates to the settings and we can simply grep the source so we don’t need to remember in what screen we can find which setting (there’s quite a few different settings between the General settings, Plugins, Tools, Theme Editor, etc etc). The main files to edit were:

functions.php:general functions for the theme. Wrote a little bit of PHP, like a helper functionget_current_day()to find out what the current “day” this is. For this we simply look at what Categories have posts in them, parse the category names (“Day NN” -> NN), sort them, and take the highest number (so NN is a number between 1 and 80, and <= 0 means we didn’t start yet). Also wrote a function which renders the progress bar based on what day we’re at, including an overlay card with more details, to be included on the welcome page.front-page.phpfor the welcome page. I put the HTML of the design we created yesterday in here.style.css: all the CSS of the design from yesterday. In addition to the custom design, adjusted the CSS of the standard WordPress navigation to blend in with the rest of the design. Added a bunch of display:none’s to hide parts we don’t care about and simplified the design overall (remove the sidebar, just use one large center column, larger font, and so on).footer.php: the footer from the design we’ve created yesterday, so it gets included on every page.header.php: top navigation links when not viewing the home page.page-search.phpis simply an empty template except for <?php get_search_form(); ?>, easy.category.php: the overview of posts within a day. Started with a copy of archive.php and replaced the wording regarding “Category” to “Day”. Customized the headings to fit well with the rest of the design, added information about what day this is and included links back to the current day if we’re rendering an older one. Also added some logic to show placeholder text + GIF in case we don’t have an entry for the day yet.- author.php: like category.php, but for showing all posts by author. Added some HTML to show a nice header with avatar + bio/links.
page-days.php: the List of Days page. Added logic to render all categories with posts in them, which then link to /day-X/.template-tags.php: customized some date and time formatting here, to give posts a cleaner look. Since we’re going to have multiple posts on a day, and we already show a large header for the day itself, we don’t need all the additional date details for each post.page-topics.php: PHP logic to render a list of all tags with posts in them.404.php: custom 404 page with mandatory meme gif.- Also simplified some of the default sections like the comments section (
comments.php) and details of a single post (single.php).
(Social) media assets
I also added some images to use as social media tags in the <head> section in header.php, like the <media og..> tags which are shown in tweets when somebody shared the 80daystartup.com URL on Twitter. To create images like that, I simply used good ol’ Inspect Element in Chrome and set the browser’s dimensions to 1200px630px (and added overflow: hidden to the body). I tweaked the font sizes a bit to fill the screen, and then used Capture node screenshot on the body, and boom, social media preview card:
I used a similar technique on the hourglass “8” to create a Favicon.
Subscribe form
Finally, I had to hook up the “Subscribe” form design from yesterday to actually do something. Ideally we just want something that sends an email newsletter around based on the RSS feed, as a weekly digest or something. All we need is the ability for people to subscribe with double opt-in (to prevent spam) and do RSS to email. This seemed surprisingly hard to find. Every newsletter app is a complete “marketing automation platform” thingamajig, which we don’t really care about.
It’s also not something we want to spend too much time on and compare a hundred solutions, so we’ve just decided to give an app called MailPoet a try. They have a WordPress plugin I installed, which then adds an option to create new forms under Mailpoet > Forms. I clicked New Form, clicked “Skip, start with a blank form” under “Select a template” and set the button label to “Subscribe”. Under Form > Form Placement, I selected “Shortcode & Other”, got the PHP code and put this in footer.php. In order to make the form blend in with our design, I simply added a bunch of CSS overwrites in footer.php until it again looked like the subscribe form we designed yesterday.
Other settings
The last changes I made was turning off all the pingback/notification logic under Settings > Discussion, I don’t think we need it. I also installed a plugin called “Code Syntax Block”, because it seems the default Code block has no syntax highlighting.
Backups
The VPS provider also provides backup snapshots, so that will be good enough for this blog. We also created this little backup script which runs once a day, just to have an easily accessible history of older versions (it keeps copies of at most 31 previous days):
#!/bin/bash
dom=`date +%d`
# backup all web/wordpress files (follow symlinks)
cd /var/www/
tar zcfh /home/backups/www_${dom}.tgz .
# backup database
mysqldump -u root --all-databases | gzip > /home/backups/db_${dom}.sql.gz
echo "backup created for day ${dom}"
~
With the site set up, I guess we’re ready to start the real work at Day 1!